
Text Block
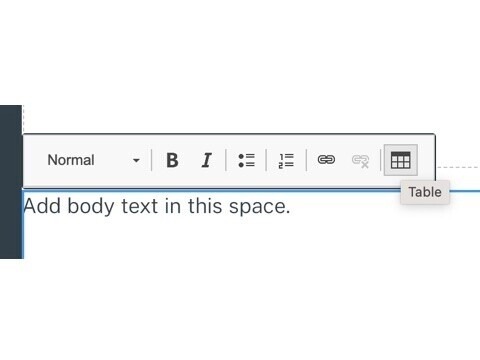
The Text component is a straight-forward yet powerful and flexible tool. The tool bar works like other online text editors and contains basic formatting controls for type format, bold, italic, bullet list, numbered list, links, and tables.
Best Practices
- Use new text blocks when you want your content to have a header. Shorter text blocks are also easier to manage on the canvas.
- Be sure that formatting is consistent. Use headers to mark new sections instead of bold text and try to use headers in order of size down the page.
- The text editor should clean most code from copy and pasted text. If you are seeing odd formatting and uneditable text it can be helpful to copy/paste from Microsoft Word into a plain text editor before adding copy to text blocks. This process should help clean other "junk" code from your work.
Settings
- Anchor - A unique name for the block. (This name can then be used as an anchor link by adding '#name' to the end of a link.)
- Intro - Use the intro setting to increase the text size by 1.5x the normal size. The Intro text should be used as the introduction of a page or section and be limited to two or three sentences.
- Two cols - Split the text block into two columns.

Text Selected w/ Formatting

Text Hyperlink Menu
Adding and Editing a Table
This caption describes the image above.
Creating a Table
Tables in Pages are a feature of the Text block. Create a new Text block and click inside of it to open the toolbar at the top; the Table button appears at the far right.
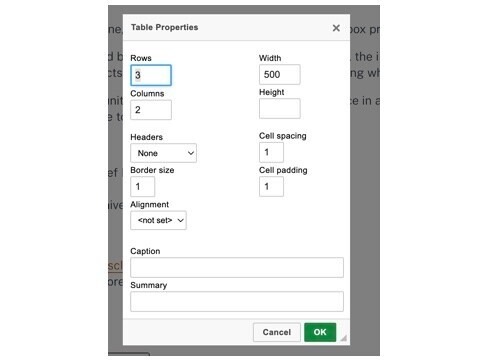
A menu of properties will open. You can use it to set the initial number of rows and columns, specify if the table has a header, and set some basic dimensions. Some of these settings will not change the way the table looks because of the preset sitewide table style rules.
This caption describes the image above.
Editing Tables
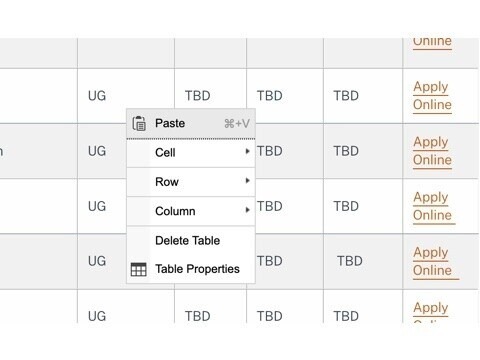
Once a table is created, right click inside of it to navigate to the table menu. There are a number of options in the menu that can help edit and manage the table.
The Table Properties menu looks the same as the original table menu when you created the table except that the Rows and Columns fields are grayed out.
This caption describes the image above.
The Cell, Row, or Column options will let you edit the structure of the table. These options will allow you to add or delete rows and columns and merge or add table cells.
If you are trying to insert a new row, make sure your cursor is in a row next to it and then select add new row above or add new row below.
updated June 30, 2026